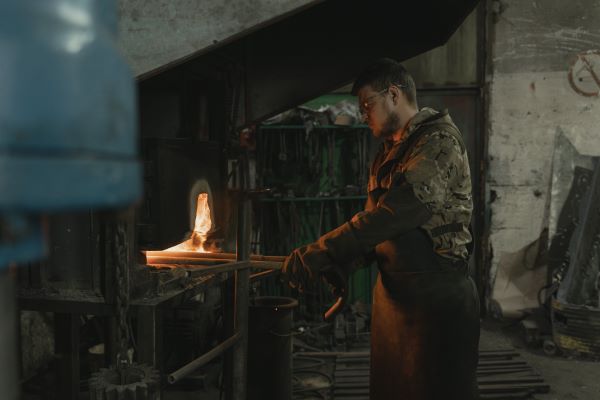
Blacksmithing is an art and a trade that is thousands of years old and is deeply embedded in cultures around the world. Any sword, axe, horseshoe or shield made from iron was created in a blacksmith’s forge for many centuries, while today the skills of a blacksmith are employed by modern industrial welders, metalworkers and farriers.
While blacksmithing was once considered a dying trade in the UK, this ancient skill is being revived as blacksmiths pass down the skills and techniques they use to create tools, art and other products.
Because blacksmiths mostly use heat to shape metal, there is relatively little waste compared to other metalworking techniques such as cutting and grinding. For some items, all of the iron in the initial feedstock is present in the final product, but in a different arrangement. Even when cutting is used, the waste is very little and these parts can be melted into new feedstocks easily.
Blacksmithing teaches a hugely creative skill set, and blacksmiths need to use patience, strength and control to work while the iron is hot. From delicate iron art to replica weaponry, blacksmithing in 2023 is finding new markets (not to mention huge audiences on social media). If you’re hoping to train as a blacksmith, this introduction will help you find your way around some of the industry jargon and basic techniques.
What is Blacksmithing?
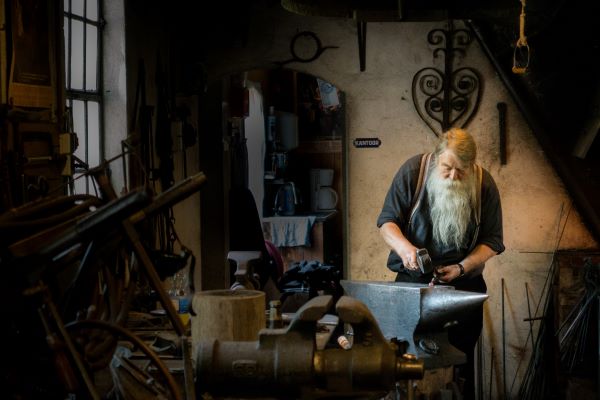
Blacksmithing is the art of manufacturing items from iron using hot and cold forging methods and tools such as a hammer and an anvil. Items a blacksmith may make include nails, screws, axes, chisels, hammers, hinges and agricultural tools such as ploughshares or pickaxes. A smith who specialises in forging and fitting horseshoes is known as a farrier.
You can tell this is an ancient art, because there are so many different words associated with the industry. The word blacksmith comes from the medieval phrase for iron: ‘black metal’, while the word ‘farrier’ comes from the Latin for iron: ‘ferrum’. ‘Anvil’ is from the Old English word ‘anfilte’, which literally means ‘beaten on’.
The History of Blacksmithing
The earliest blacksmiths, the first to smelt iron from iron ore, are thought to have been the Hittite people in Anatolia (present-day Turkey) in around 1500 BCE. The Hittite empire bordered the Egyptian and Assyrian empires. These ancient people developed smelting processes for creating iron tools over many years, along with copper and tin.
Understanding how blacksmithing works
Blacksmithing works by displacing the material in a workpiece into the intended position. When the iron is heated in the forge, it is easy to manipulate using a hammer and anvil.
Chemically, blacksmithing works because the bonds between the iron molecules loosen with heat. When the iron is heated in the forge, it becomes malleable or easy to shape.
For example, when drawing out, the high force of the hammer striking the hot iron against the anvil squeezes the molecules to create a flatter, longer shape, just like when you pinch stiff clay between your fingers. The forces are much higher, but on a molecular level, the process is the same.
This repeated compression changes the shape of the metal. When cooled, the bonds strengthen again and the iron hardens in the new shape.
Blacksmithing Definitions
To describe how blacksmithing or forging works, we’ve talked about the technique known as hammering. Before we can really get into a full introduction to blacksmithing techniques, we need to cover some terms and definitions.
Forge
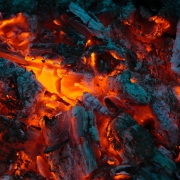
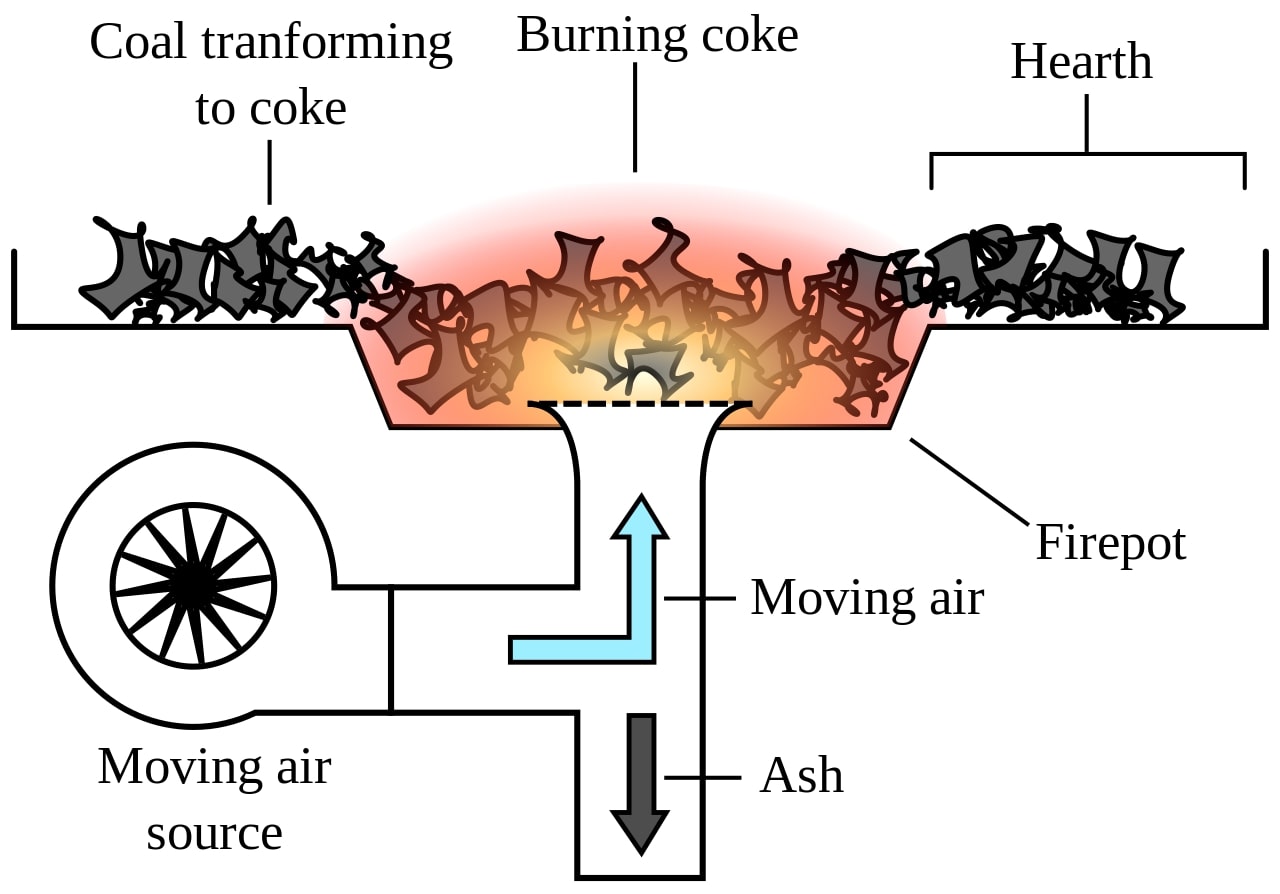
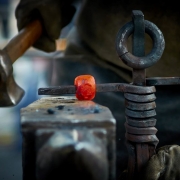
A forge is a heat source used to heat iron to temperatures where it is soft enough to shape. Many modern forges use propane gas, but the traditional method uses solid fuels such as coal or charcoal to reach high temperatures.
How to light a coal forge
Forging
The forge is the heat source, but “forging” is the whole process of heating and shaping metal through compressive force (as opposed to cutting or grinding).
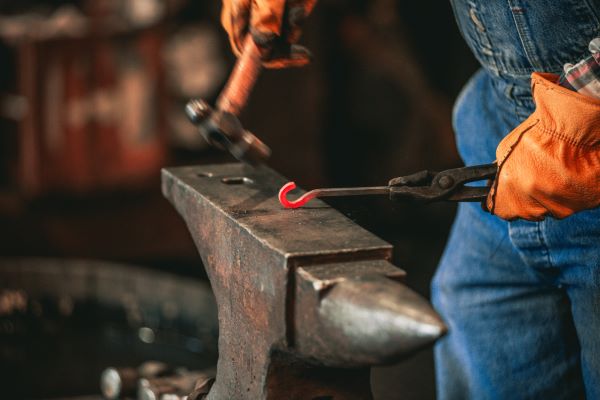
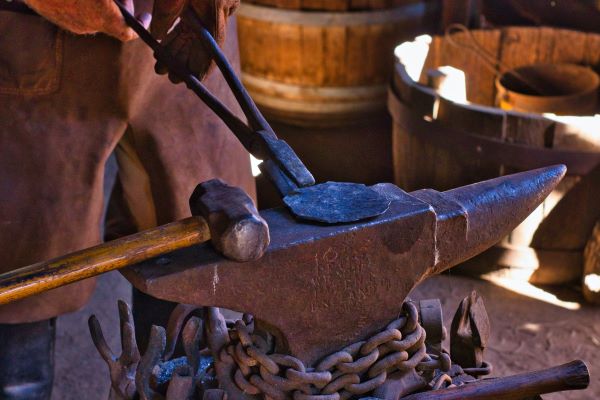
Hammering
As it says on the tin, hammering is hitting the heated iron with a hammer to control the shape. By hitting the iron against an anvil or in a mould or die, a huge variety of shapes can be made. You can’t just whack the iron, though. Hammering can be a series of accurate, hard strikes, or lighter rapid blows to create small changes or cuts against an anvil blade.
Drawing Out
Drawing or drawing out is the process of pulling the metal into a longer and thinner shape, using the hammer and anvil. The sharper the angle, the more the iron will move. With a rounded hammer face against the horn of the anvil, you’ll get a lot of movement. This is one of the first techniques a smithy learns.
-
-
- Use tongs to hold your piece on the anvil
- Hammer both sides to extend the length
Upsetting
While drawing makes the metal longer and thinner, upsetting makes the metal thicker, shorter and narrower. This is an advanced technique and can be difficult to control, and is used to make wider areas for joints or decorative finials for gateposts
-
-
- Heat just the part of the metal you want to shape to avoid distorting other parts.
- Hammer the end of the bar towards the length so that it swells out.
With large bars, you can upset the ends or sections in the middle by heating the target area and dropping it vertically onto an anvil. The weight of the bar will compress the heated area to create an upset area.
Bending
Instead of hammering against the flat part of the anvil, bending uses the anvil horn to create curves and bends in the iron.
-
-
- Heat the section to bend
- Hold the iron over the horn and strike it with the hammer to bend it to the desired angle
- Heat small sections and bend a little at a time for a more accurate curve if you are making a long curve.
- To unbend the workpiece, reheat it and reverse the steps.
Punching
Punching makes holes in the metal using a slot punch and a drift. The slot punch has a tapered end like a chisel while the drift is blunter and used to widen the punched hole.
Heat the target section of the metal.
Hammer the slot punch through the heated section of the metal. This makes a slit, as well as causing swellings around the hole, which can have a pleasing appearance and serve to maintain the strength of the metal around the hole.
Once the slit is made, drive a drift through it to widen and shape as needed.
How to Start Blacksmithing
Beginning a new trade, hobby or skill is often more complicated than people assume. Blacksmithing in particular involves dangerously high heat and heavy tools, so it is important not to go about it lightly.
Research
Find out all you can about the first skills a blacksmith must learn. You’re already on this path just by reading this article, but there is much more to pay attention to before you decide if this is something for you. You could attend a local demonstration or contact a forge and ask them about the work. This will give you the most accurate and realistic picture of what blacksmithing is like.
Training
The number of blacksmithing courses available is growing, so look for some proper in-person training. This will give you the best grounding in the basics. There are blacksmith apprenticeship training courses at some locations, so you can learn the technical skills required to work in a forge, or private courses that are appropriate for hobby blacksmiths.
Tools
At the very minimum, a blacksmith needs a forge, a hammer and an anvil. Your anvil could be any dense, flat metal surface, but the best results will come from using a proper anvil. The hammer should have a curved face and a flat face on either end of the head. Fuel your forge with blacksmithing coal. Basic safety equipment such as gloves and tongs are also important. With these tools and some training, you’ll be able to forge your own slot punch and drift, and eventually, any other tools you want.
Supplies
Your main running costs as a blacksmith will be fuel for the forge, such as coal or charcoal, and wrought iron bars to work. Once you have a supply of these things, you’re ready to be a blacksmith.
Where can I get my blacksmithing supplies?
For tools, your best suppliers will be other forges.
-
- Vaughan’s offers a small anvil for just £25.
- Fransham Forge in Norfolk delivers blacksmithing tools from their online shop.
- You can often find tools second-hand online.
For fuel, look no further. Swann’s Coal Supplies are the West Midland’s leading supplier of blacksmith coal, including coke bean, coal trebles, coal doubles and large cobbles. We supply high-quality forge coal in pre-packed bags and open-sack delivery.
Blacksmithing FAQs
To round off your introduction to blacksmithing, we’ve collected some of the most frequently asked questions (and their answers) so you have everything in one place.
How much money do blacksmiths make?
For an employed blacksmith, the average salary is £31,625 per year or £15.63 an hour. When self-employed, a skilled blacksmith can sell custom pieces for large amounts, particularly if they are replicas or bespoke designs.
What’s the best way to learn blacksmithing?
There are many blacksmithing courses available across the UK, either privately in person or online, or in a college. The college courses will provide a qualification equivalent to an A Level, whereas those who complete private courses gain a certificate of achievement or similar.
There are also workshops and experience days which cost upwards of £150 to attend, which can be a good place to start to see if you enjoy it.
Can I learn blacksmithing at home?
With access to a forge, tools and blacksmith coal, and a bit of time and patience, you can learn blacksmithing at home.
What materials do you need to start blacksmithing?
-
- Fuel: coal, charcoal or propane, depending on your forge. You will need to choose a blacksmith coal that burns at a high heat per kilo, so you can heat your iron enough without using too much.
- Iron: a supply of iron bars will allow you to make pretty much anything, so focus on finding these first.
Is Blacksmithing Easy?
Blacksmithing is like chess: you can learn the rules in a relatively short time, but it takes a lifetime to master. Your first few projects will likely turn out a little wobbly, but if you keep up your morale and keep practising, you can gain the basic skills and make some good simple tools in a relatively short time.
Can blacksmithing be dangerous?
Absolutely. Blacksmithing involves heavy tooling and extremely hot flames. Without a basic understanding of forge safety, an inexperienced blacksmith can suffer serious burns.
A forge needs to burn at approx. 1371oC, and the iron when heated can stay hot for up to two minutes, so it’s important to use your judgement and never pick up the hot part of the iron stock.
Swann Coals are experts in the supply of Blacksmith’s coal. If you have any questions about blacksmith’s coal or wish to order over the phone call 01922 408 152